Injection Waterproofing for Basement and Underground Concrete Structures
Introduction:
Water rarely follows a straight path through underground concrete. It can enter through one crack, travel along a construction joint, and appear several feet away. That is why sealing the visible wet spot often fails.
Injection waterproofing goes after the leak path inside the concrete. Contractors drill into cracks or joints, install injection packers, and inject grout into the interconnected voids. The grout then reacts or cures inside the structure.
This approach works well for basements and underground structures where you can’t get to the outside. But success depends on more than the grout — you need to find the water path, identify the crack type, pick the right material, and control injection pressure.
Below-grade structures are subject to groundwater and hydrostatic pressure. Water accumulation around basements can drive moisture through cracks, joints, and penetrations. Foundation crack injection can seal local paths, but drainage and external waterproofing may still need attention when water pressure affects the whole structure.
The need for careful water management may grow. A 2026 study using data from nearly 50,000 rain gauges found that rising temperatures change rainfall intensity and frequency. The study supports continued attention to heavy rainfall, runoff, and water infiltration risks in infrastructure planning.
This guide explains how waterproofing injection grouting works, how to choose between polyurethane, acrylate, epoxy, and polyurea grout, and how to reduce the chance of leaks coming back.
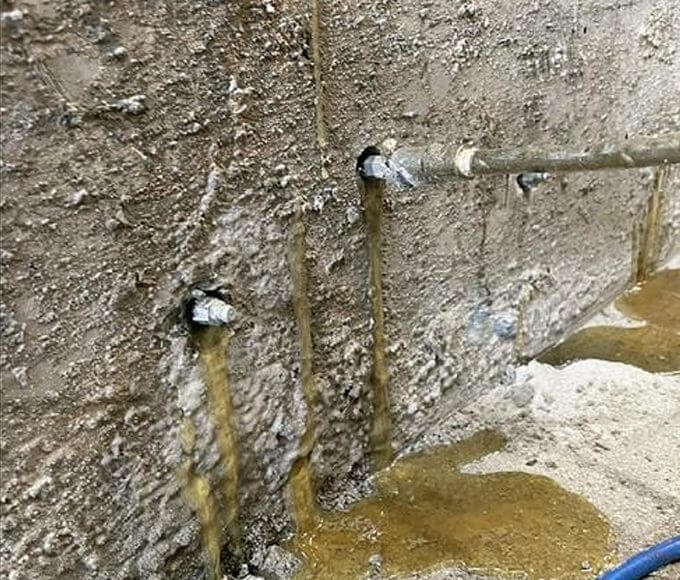
What Is Injection Waterproofing?
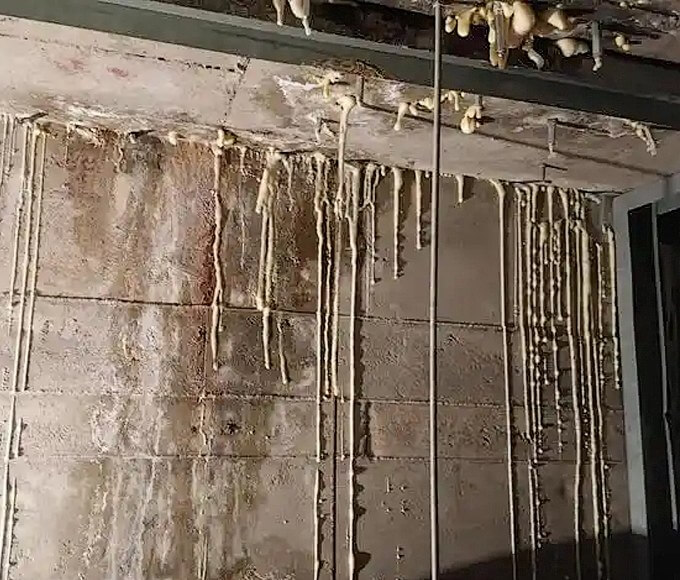
Injection waterproofing sends liquid grout into cracks, joints, voids, and hidden leakage channels inside concrete.
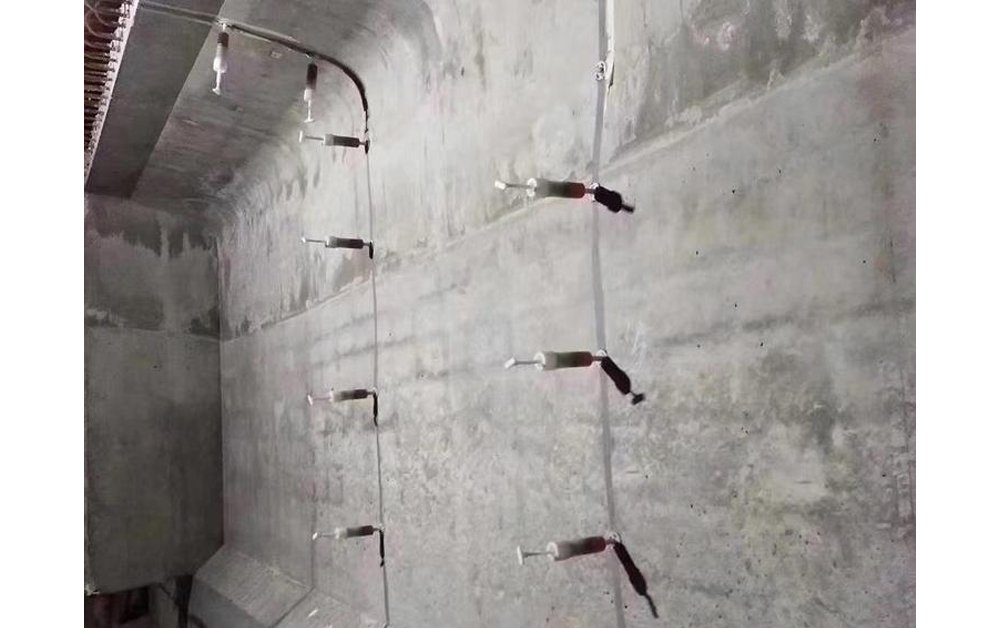
The contractor first drills holes near the leak. Then the team installs packers and connects a grouting machine. Controlled pressure pushes the material into the crack network.
After injection, the material reacts or cures inside the concrete. Depending on the grout, it may foam, form a flexible gel, bond two crack faces, or create an elastic sealing body.
This method differs from surface waterproofing.
A coating covers a wider wall or floor area. Injection grout enters a local crack or joint. If water already moves through an internal concrete path, a surface coating may hide the wet mark without filling the source channel.
What Injection Waterproofing Can Do?
Contractors often use injection waterproofing for:
- Concrete wall cracks
- Construction joints
- Wall-to-floor joints
- Pipe penetrations
- Honeycombed concrete
- Expansion joints
- Underground parking structures
- Utility tunnels
- Basement walls and slabs
- Local leakage behind completed finishes
What Injection Waterproofing Cannot Do Alone?
Injection does not constitute a complete underground waterproofing solution.
If the whole structure has ongoing hydrostatic pressure, blocked drainage, widespread membrane failure, or major movement, you need a broader plan. That might include exterior waterproofing, drainage repair, sump systems, structural assessment, or joint reconstruction.
Foundation crack injection is one recognized interior repair method for poured concrete. Epoxy often serves structural crack repair, while hydrophobic or hydrophilic polyurethane products commonly seal moisture and water paths.
Where Water Enters Underground Concrete Structures?
A wet patch only shows where water leaves the concrete. It does not always show where water entered.
Before grouting waterproofing, contractors should inspect the full structure and map each crack, joint, penetration, and damp area.
Concrete Wall Cracks
Concrete can crack due to shrinkage, settlement, temperature movement, loading, or poor curing.
Some cracks remain dry and stable. Others stay damp or carry flowing water. The team should also decide whether the crack is active or inactive.
This classification affects material selection. A rigid structural resin may suit a dry, stable crack. A water-reactive or flexible grout may suit a wet leakage channel.
Wall-to-Floor Joints
The joint between a basement wall and floor slab often becomes a weak water path.
Crews may pour the wall and slab at different times. The resulting joint can contain small gaps, weak bonding, or defects around the waterstop.
Water may then travel along the joint and emerge at several points. A single injection at one wet spot may only move the leak farther along the wall.
Construction Joints and Cold Joints
Construction joints form where concrete placement stops and starts again.
Poor compaction, contamination, or uneven contact can create connected channels inside the joint. When an old waterstop loses performance, water may follow those channels.
Contractors may use polyurethane grout for active wet joints. They may consider low-viscosity acrylate grout when the leakage moves through fine and connected paths.
Pipe Penetrations and Utility Openings
Pipes, cables, and service lines create openings through underground walls.
The original seal may shrink, crack, or separate from the pipe. Pipe movement can also reopen the gap.
A surface sealant may close the visible edge but leave a deeper annular path behind it. In these cases, crews may drill around the penetration and inject the hidden void.
Honeycombs and Voids
Poorly compacted concrete can contain honeycombs, larger pores, and connected voids.
These defects may carry water in several directions. A small crack injection plan may not fill the full area.
The team should assess the void size and select a material with suitable flow, reaction, and volume-filling behavior. Large defects may need staged injection or a combination of grout types.
Expansion Joints and Moving Cracks
Expansion joints and moving cracks need flexibility.
A rigid material may bond at first but crack again when the structure moves. Contractors should confirm the expected movement before selecting the grout.
Some moving joints need an elastic injection material plus a surface joint-sealing system. Injection alone may not restore a failed joint profile.
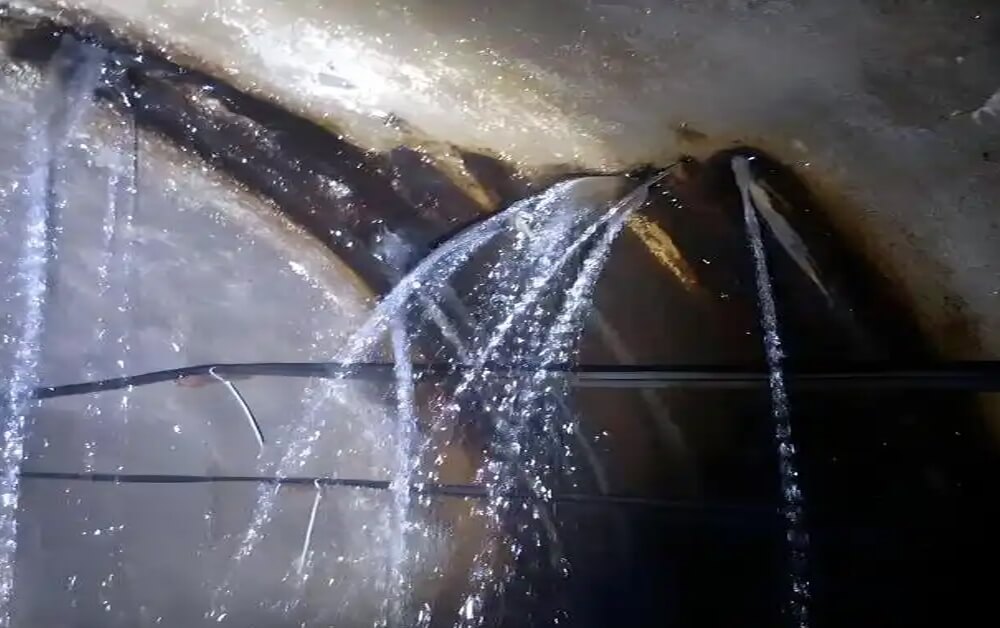
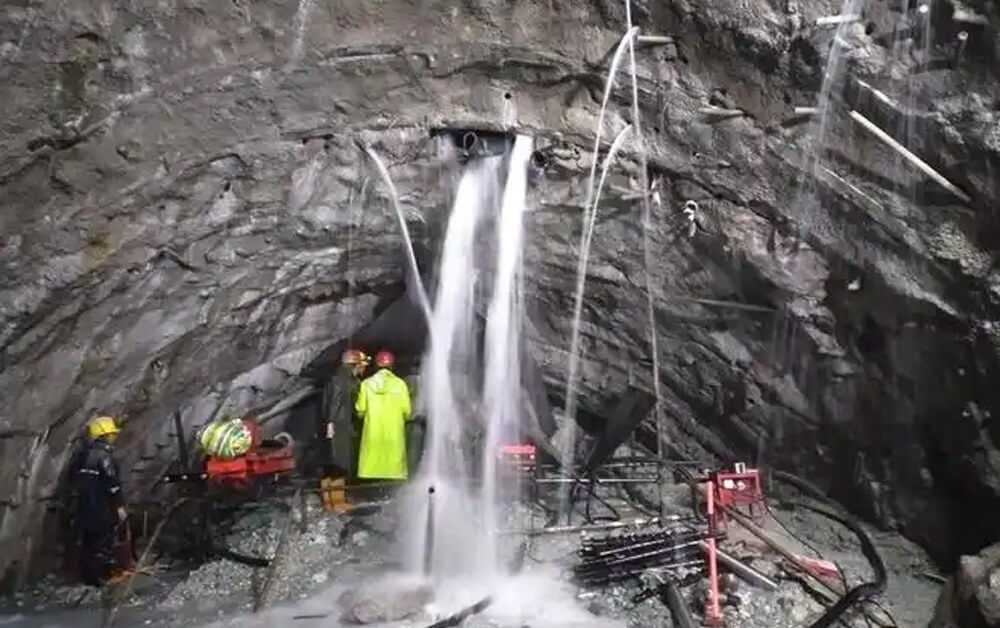
When Injection Waterproofing Is the Right Repair Method?
Injection works best when the team can define a local leakage path.
Suitable Conditions
Consider injection waterproofing when the project involves:
- A leaking crack in poured concrete
- A wet construction joint
- Leakage at a wall-to-floor connection
- Water around a pipe penetration
- Dripping cracks in an underground parking area
- Local voids behind the concrete surface
- A completed structure with no practical exterior access
- A previous injection area that needs repair
- A fine seepage network that requires low-viscosity grout
Conditions That Need a Wider Plan
Do not rely on local injection alone when the structure shows:
- Widespread dampness across a whole wall
- Frequent new cracks
- Major wall movement or deformation
- Continuous high groundwater pressure
- Failed exterior drainage
- Large-scale slab uplift or water inflow
- Severe concrete damage
- Broad failure of an external waterproofing membrane
- Water entering from several unrelated areas
Below-ground structures exposed to a water table may require continuous waterproofing around walls and slabs because hydrostatic pressure acts on both the membrane and the structure.
How Waterproofing Injection Grouting Works?
The method follows a simple idea: place the grout inside the route that water uses.
In practice, the work requires careful drilling, stable packers, suitable equipment, and close observation.
The Grout Enters the Leakage Channel
Contractors usually drill at an angle beside a crack. The hole should intersect the crack inside the concrete rather than only touch its surface.
The team installs a mechanical packer in each hole. The packer seals the opening and connects the hole to the injection gun.
The pump then pushes grout into the crack. When grout reaches the next packer or appears along the crack, the crew gains useful information about the connected path.
The Material Reacts or Cures
Different grout types behave in different ways.
Polyurethane grout may react with water and create foam or an elastic sealing mass. Acrylate grout can remain fluid long enough to enter fine cracks before it gels.
Epoxy resin usually cures into a hard bond. Polyurea grout can form an elastic sealing material for selected joints and recurring leakage areas.
The team must match viscosity and reaction time with the actual water flow. A grout that reacts too fast may stop near the injection point. A grout that reacts too slowly may wash away in strong water flow.
The Injection Cuts Off the Water Path
Good injection fills or seals the internal channel.
If the contractor only blocks the outlet, water may find another weak point. That is why crews often inject along the full crack or joint instead of treating one visible drip.
Pressure readings, grout movement, and material appearance at nearby points help the team judge progress.
Choosing Grout for Basement Injection Waterproofing
No single grout fits every underground leak.
You need to pick based on water flow, crack width, moisture, movement, and what you’re trying to achieve.
Injection Grout Selection Table
| Leakage condition | Suggested material direction | Main purpose | Main point to confirm |
| Active flowing water | Hydrophobic polyurethane grout | Rapid water stopping and foam sealing | Reaction time, expansion, and pressure control |
| Wet or damp crack | Hydrophilic polyurethane grout | Sealing under moist conditions | Water exposure and cured material behavior |
| Fine seepage network | Acrylate grout | Low-viscosity penetration and gel sealing | Gel time, mixing ratio, and equipment |
| Dry, stable structural crack | Epoxy injection resin | Structural bonding | Crack stability and moisture condition |
| Moving joint or flexible repair | Polyurea grout | Elastic sealing | Joint movement and material compatibility |
| Large void or backfill area | Cementitious or polymer filling grout | Volume filling and stabilization | Void size and ability to enter narrow channels |
Hydrophobic Polyurethane Grout for Active Leakage
Hydrophobic PU grout is a go-to for active water flow.
It reacts with water and can form a water-resistant foam. This behavior allows it to fill open leakage paths and reduce water movement.
But high expansion doesn’t always mean better. Check viscosity, reaction time, foam structure, adhesion, and cured stability.
Fast reaction helps with strong flow but can limit penetration. Balance water stopping with crack filling.
Hydrophilic Polyurethane Grout for Wet Cracks
Hydrophilic polyurethane grout functions in contact with moisture.
It suits wet concrete cracks, damp joints, and leak paths exposed to water. The material reacts and forms a sealing body inside the channel.
Contractors should still check the expected water pressure and the final cured behavior. Hydrophilic grout does not fit every high-flow condition.
The application team should also control pressure. Excess pressure can force grout into unwanted areas or damage weak concrete.
Acrylate Grout for Fine Seepage
Acrylate grout usually offers low viscosity. This allows it to move through fine cracks, capillary paths, and small connected voids.
Contractors often consider it for fine seepage, construction joints, curtain injection, or difficult leakage networks behind concrete.
Gel time plays a key role. The team needs enough time for the grout to reach the target area, but not so much time that flowing water carries it away.
Many acrylate systems use two components. The pump and mixing system must keep the ratio stable.
Epoxy Injection for Dry Structural Cracks
Epoxy injection resin focuses on bonding crack faces.
It can restore continuity in a dry, stable concrete crack when the project needs structural repair. A qualified engineer should assess cracks linked to movement, loading, or structural damage.
Epoxy is not usually the first choice for active water flow. Moisture and movement can affect the repair plan.
Do not select epoxy only because it provides high strength. First decide whether the project needs structural bonding or water stopping.
Polyurea Grout for Selected Moving Joints
Polyurea grout can serve selected joints and cracks that need elastic sealing.
It may suit deformation joints, recurring leakage paths, or areas where a rigid repair could crack again. Its use depends on the product formula and joint movement.
Polyurea grout should not replace PU grout in every active leak. In some projects, crews may use PU first to control water and then apply an elastic material in another stage.
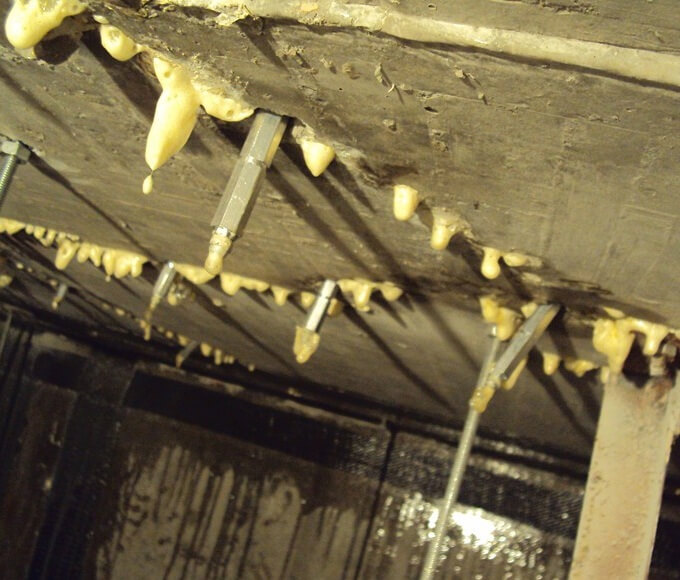
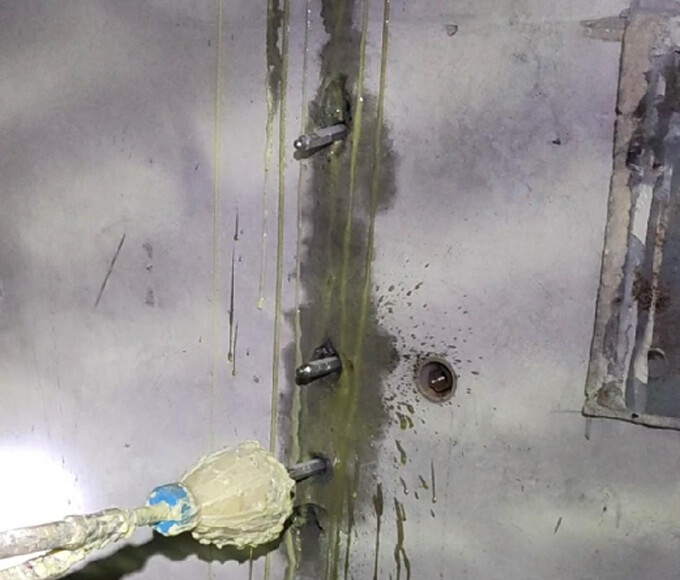
Concrete Crack Injection Process
A clear process reduces guesswork.
Recommended Process Flow:
Leakage survey → Crack classification → Choose grout → Drilling → Packer installation → Check equipment → Controlled injection → Packer removal → Surface repair → Post-injection inspection
Step 1: Survey the Leak
Inspect the area before drilling.
Record:
- Crack direction
- Crack length
- Visible width
- Damp sections
- Dripping points
- Flowing water
- Construction joints
- Pipe penetrations
- Honeycombed areas
- Previous repair points
Take photos and videos. They help the team review and give you a record for later.
When possible, inspect the structure after rain or during a higher groundwater condition. This can reveal paths that remain hidden during dry periods.
Step 2: Classify the Crack
Ask a few basic questions:
- Is the crack dry, damp, or flowing?
- Does it move?
- Is it structural?
- Is it narrow or open?
- Does the water carry pressure?
- Is it one crack or part of a network?
- Does the crack connect with a joint?
These answers guide the material choice and drilling plan.
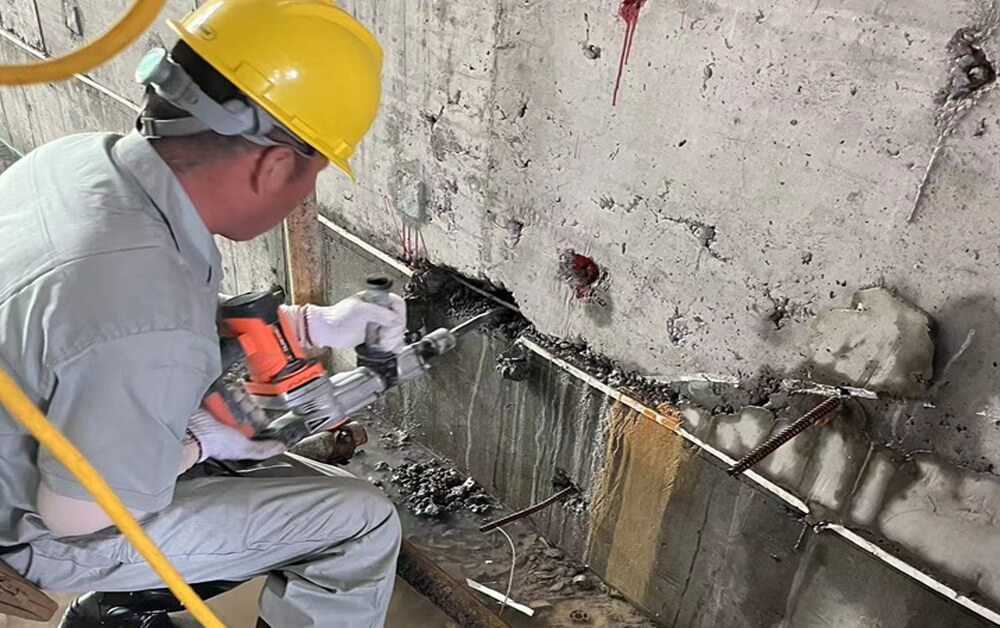
Step 3: Drill the Injection Holes
Select the drilling angle based on wall thickness and crack position.
For many wall cracks, crews drill beside the crack at an angle. The hole should cross the crack below the surface.
Do not use one fixed packer spacing for every project. Crack width, wall thickness, grout viscosity, and expected spread all affect the layout.
Step 4: Install the Packers
Install each packer firmly.
A loose packer can leak grout and lose pressure. An oversized or undersized packer may not seal the hole.
The contractor should match the packer diameter to the drilled hole. The high-pressure hose and injection gun should also fit the packer connection.
Step 5: Check the Grouting Machine
Inspect the machine before injection.
Check:
- Pressure gauge
- High-pressure hose
- Injection gun
- Connectors
- Seals
- Pump output
- Power supply
- Material compatibility
A single-component PU grout needs different handling from a two-component acrylate system. The equipment must match the material.
Clean the machine as required when switching products. Cured material inside a hose or pump can block the system.
Step 6: Inject Under Controlled Pressure
Start at low pressure.
Increase pressure only when the site response requires it. Watch the crack, nearby packers, and surrounding joints.
Stop or change the sequence when:
- Grout appears at the next packer
- Material reaches the crack surface
- Pressure rises sharply
- The pump no longer moves grout
- Unwanted leakage appears nearby
- Weak concrete shows distress
High pressure does not always improve penetration. It can widen cracks, break weak concrete, or force material outside the target zone.
Step 7: Move Through the Injection Sequence
Crews often work from a lower point toward a higher point on a vertical crack. However, the exact sequence should follow the leakage pattern and site plan.
After injecting one packer, the contractor may close it and move to the next. Connected grout flow helps confirm that the material has entered the internal channel.
Complex joints may need more than one injection pass.
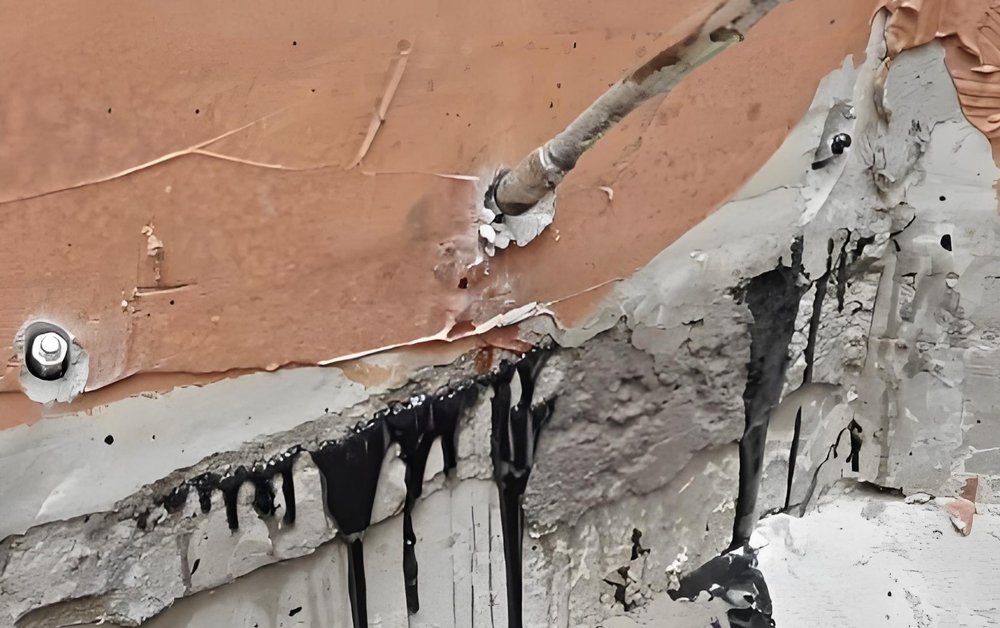
Step 8: Remove Packers and Repair the Holes
Allow the grout to react or cure according to the product instructions.
Then remove or cut the packers, depending on the packer type. Repair each drilled hole with a suitable repair material.
Clean excess grout from the surface. Do not leave open holes or loose packer parts in the repair area.
Step 9: Inspect the Repair
Check the wall or slab after injection.
Look for:
- Remaining drips
- New wet marks
- Water movement at nearby joints
- Unfilled crack sections
- Failed packer holes
- New leakage after rainfall
A second local injection may be necessary. Underground water paths can change after the first channel closes.
Common Injection Waterproofing Problems
Many injection failures begin before the pump starts.
Injecting Only the Visible Outlet
The visible drip may sit far from the point where water entered.
If crews inject only that spot, the grout may block the outlet without filling the connected route. Water can then emerge nearby.
Map the full crack or joint first.
Choosing the Wrong Grout
A slow, low-viscosity grout may wash away in heavy flow, a fast foaming grout may stop too early in a fine, deep crack.
A rigid epoxy may fail in a moving joint, a flexible water-stop grout may not provide structural bonding in a dry crack.
Choose the repair goal before choosing the product.
Missing the Crack During Drilling
A hole can look correct from the surface but miss the crack inside the wall.
When this happens, pressure rises without useful grout spread. The material may enter pores around the hole instead of the leakage path.
Adjust the angle or drill a new hole when site feedback shows poor connection.
Poor Packer Installation
Loose packers cause pressure loss and surface leakage.
They also make it hard to judge whether grout has entered the crack. Use the correct packer size and tighten it enough to seal the hole without damaging the concrete.
Using Excessive Pressure
High pressure can widen a crack or damage weak concrete.
It can also push grout into drains, cavities, finished areas, or neighboring services. Start low and raise pressure in small steps.
Monitor the structure during injection.
Ignoring External Drainage
Injection can seal local cracks, but it cannot remove groundwater around the building.
Blocked perimeter drains, damaged sump systems, poor ground slope, and high water tables can keep pressure against the structure. Basement waterproofing plans often combine crack injection with drainage and exterior measures for this reason.
Skipping Follow-Up Inspection
A dry wall on the same day does not confirm long-term performance.
Groundwater levels change after rain. New pressure may reveal a nearby path.
Record the repair and inspect the area under later wet conditions.
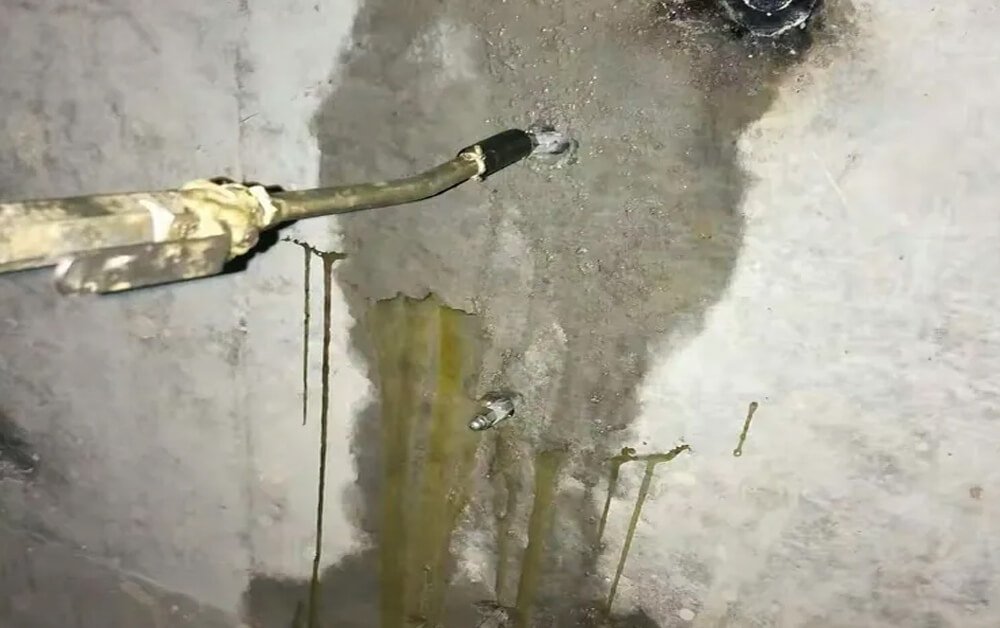
Underground Injection Grouting Project Checklist
Before asking for a material recommendation, provide clear project information.
| Information needed | Why it matters |
| Structure type | Basement, underground passage, parking area, tunnel, or utility structure |
| Leakage location | Wall, floor, roof slab, joint, or penetration |
| Photos and videos | Show crack direction, water flow, and access conditions |
| Crack width and length | Guide drilling and grout selection |
| Water condition | Dry, damp, dripping, or flowing |
| Water pressure | Affects reaction time and injection plan |
| Crack movement | Helps identify rigid or flexible repair needs |
| Existing equipment | Confirms pump and material compatibility |
| Packer size | Must match the drill hole and connection |
| Site temperature | Affects material reaction and curing |
| Required documents | TDS, MSDS, COA, labels, and packaging |
| Purchase plan | Sample, trial order, project order, or repeat supply |
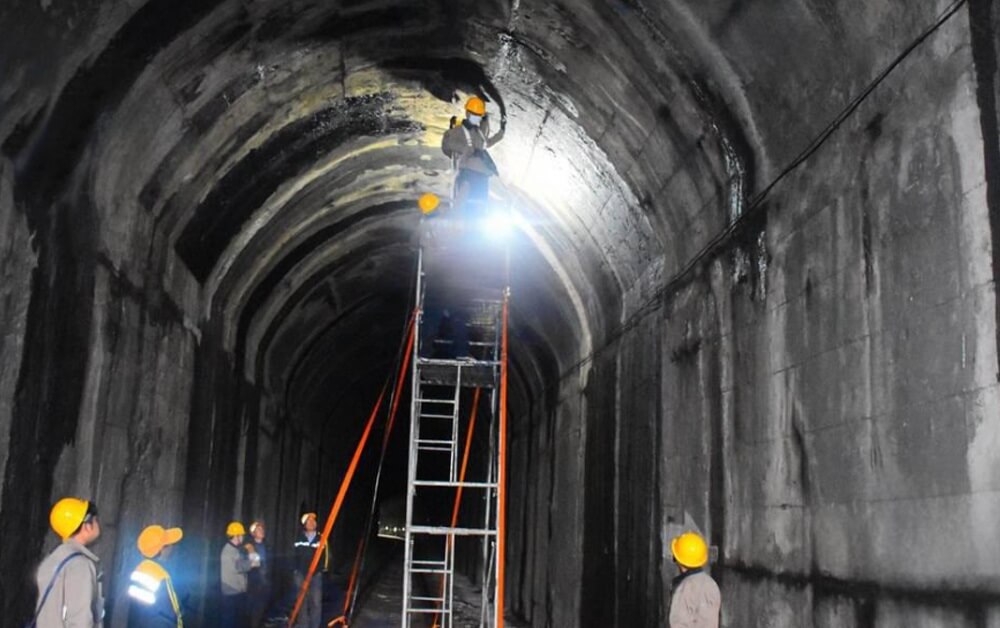
Case Example: Injection Waterproofing for Underground Concrete Structures in Singapore
YURU Waterproof supplied injection materials to a construction contractor working on underground concrete structures in Singapore.
The contractor already owned grouting machines. It needed suitable grout materials and injection packers for different leakage paths on the project.
The final supply included:
- Hydrophilic polyurethane injection grout
- Acrylate injection grout
- Injection packers
Project Challenge
The underground concrete structure contained leakage paths with different characteristics.
Some areas involved wet cracks and water-contact conditions. Other areas contained finer seepage paths that needed deeper material penetration.
Using one grout for every location could have limited the repair. YURU therefore supplied two material types for different parts of the injection work.
Why the Contractor Selected Hydrophilic PU Grout:
Contractor used hydrophilic polyurethane grout for wet concrete cracks and moisture-related leakage channels.
This material direction allowed the team to inject grout into damp paths where contact with water formed part of the reaction and sealing process.
The team still needed to match injection pressure and reaction time with the actual crack. Hydrophilic performance does not remove the need for controlled application.
Why the Contractor Also Selected Acrylate Grout:
The contractor selected acrylate grout for finer cracks and complex seepage paths.
Its low viscosity made it suitable for areas where a thicker grout might not travel far enough. The contractor could use the acrylate system to reach small connected channels inside or behind the concrete.
The two materials did not compete with each other. They served different conditions within the same underground waterproofing project.
Using Existing Grouting Machines
The contractor already had injection equipment, so it did not purchase new machines from YURU.
YURU supplied injection packers for the drilled holes. The contractor then connected its own equipment to the packers and completed the injection work.
Before application, the team needed to confirm equipment compatibility. This point mattered most for the acrylate grout because the product system may require controlled component ratios and suitable two-component handling.
Injection Approach
The contractor divided the leakage areas according to crack and water conditions.
The team used the hydrophilic PU grout where wet cracks required moisture-reactive sealing. It used acrylate grout where finer paths needed low-viscosity penetration.
The team installed packers, injected under controlled pressure, and inspected the repaired areas after application.
No fixed pressure, hole spacing, material volume, or project area is stated here. Those figures depend on the actual structure and were not recorded for this article.
Customer Feedback
After completing the work, the contractor reported that the selected materials solved the leakage problem and performed well under the project conditions.
This feedback relates to the completed project. It does not support a claim of lifetime repair or guaranteed performance under every future groundwater condition.
Correct drilling, material selection, packer installation, pressure control, and follow-up inspection all contributed to the result.
Continued Cooperation
The Singapore contractor continues to work with YURU.
The ongoing relationship shows the practical value of matching the grout with the leakage condition. It also shows why experienced contractors may need more than one material for complex underground concrete structures.
Lessons from the Singapore Project
The project offers five useful lessons:
- One underground structure can contain several types of water paths.
- Hydrophilic PU and acrylate grout serve different injection needs.
- Existing equipment must match the selected material.
- Packers affect pressure transfer and grout delivery.
- Good results depend on diagnosis, material, equipment, and workmanship.
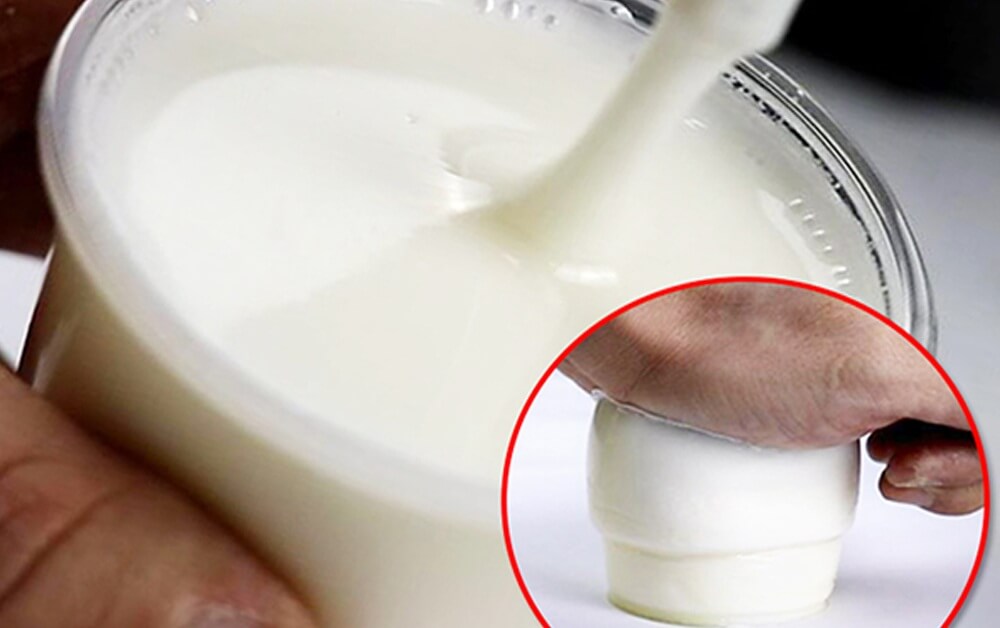
YURU Materials and Equipment for Injection Waterproofing
YURU Waterproof supplies materials and accessories for underground leakage repair, concrete crack injection, and joint grouting.
Polyurethane Injection Grouts
YURU’s polyurethane injection range includes:
- Oil-based hydrophobic polyurethane grout
- Water-based hydrophilic polyurethane grout
- Water-based foaming PU grout
- Two-component PU injection resin
- Project-specific PU grout options with different reaction profiles
These materials can support basement cracks, construction joints, active leakage, tunnels, underground parking structures, and other concrete repair work.
Acrylate, Epoxy, and Polyurea Grouts
YURU also supplies:
- Acrylate grout
- Epoxy injection resin
- Polyurea grout
- Microcrystalline polyurea grout
- Reinforced polymer grout
Each product serves a different purpose.
Acrylate grout targets fine seepage and low-viscosity penetration. Epoxy resin targets selected dry structural cracks. Polyurea and reinforced polymer systems serve specialized elastic sealing or reinforcement needs.
Grouting Machines and Injection Packers
YURU can supply:
- Single-component high-pressure grouting machines
- Two-component grouting machines
- Injection packers
- Injection guns
- Related hoses and accessories
The material and machine must match. A single-component machine cannot automatically handle every two-component grout.
Packer diameter must also match the drilled hole and the injection connection.
Technical and Supply Support
YURU can support projects with:
- TDS
- MSDS
- Sample testing
- Material selection communication
- Basic application guidance
- OEM and ODM services
- Private-label packaging
- Customized labels and package sizes
- Grout, machine, and packer supply packages
FAQs:
Injection waterproofing pumps liquid grout into concrete cracks, joints, and hidden leakage paths. The material reacts or cures inside the structure and seals the route used by water.
Contractors often consider polyurethane grout for active leakage. Hydrophobic PU commonly targets flowing water and foam sealing. Hydrophilic PU can suit wet cracks and moisture-contact conditions. The final choice depends on flow, pressure, crack size, and reaction time.
Yes. Contractors can inject many poured-concrete cracks from the interior when the outside face cannot be reached. The holes must intersect the internal crack instead of only sealing its visible surface.
Common causes include incorrect diagnosis, missed drilling, poor packer installation, wrong grout selection, excessive or inadequate pressure, crack movement, and continued external water pressure.
Yes. YURU supplies polyurethane grout, acrylate grout, epoxy injection resin, polyurea grout, grouting machines, and injection packers. Support services include samples, TDS, MSDS, OEM/ODM, and customized packaging.
Conclusion: Start with the Leakage Path
Successful injection waterproofing starts with the leakage path.
Use polyurethane grout when the project needs to seal wet or active leakage channels. Consider acrylate grout for fine seepage and connected capillary paths. Use epoxy resin when a dry, stable crack needs structural bonding.
For moving joints, select a material that can tolerate movement. For widespread water pressure, inspect drainage and the full waterproofing system instead of relying on local injection alone.
The pump, packer, grout, hole angle, and pressure must work as one system. When contractors follow that logic, waterproofing injection grouting becomes a controlled repair method rather than a trial-and-error process.
Send YURU Waterproof clear photos and videos of the leakage area. Include the structure type, crack width, water flow, existing equipment, and expected purchase quantity.
YURU can discuss polyurethane grout, acrylate grout, epoxy injection resin, polyurea grout, grouting machines, injection packers, samples, technical documents, OEM/ODM services, and customized packaging for your project.
YURU Product solutions